Are you mad at that big box of parts? You can learn how to assemble a lawn sweeper with two hand tools. I built mine in the Midwest to save my back from deep fall leaves. I have set up a ton of these yard tools to clean huge lawns. Read these quick steps to build yours fast and go rest!
Tools and 5-Minute Prep That Saves You Frustration
Skip this step, and you will waste a lot of time later. This tiny setup pays off very fast!
Learning how to assemble a lawn sweeper can feel scary. I stared at a huge box of parts last Saturday. My garage floor felt cold. I just wanted a clean yard. I felt so lost at first! But figuring out how to put a lawn sweeper together is easy. You just need a quick setup.
Basic Tools
You do not need a fancy work shop. Just grab these simple things from your house:
- Adjustable wrench: Fits all the odd nuts perfectly.
- Socket set: This is optional, but it makes the job much faster.
- Screwdriver: A basic flat head or cross head works fine.
- Gloves: Metal edges are very sharp. Protect your hands!
| Tool Name | Why You Need It Today |
| Wrench | Tightens the big frame bolts safely. |
| Socket Set | Speeds up the whole building process. |
| Screwdriver | Locks in the small metal screws. |
| Thick Gloves | Stops nasty cuts on your fingers. |
Quick Prep
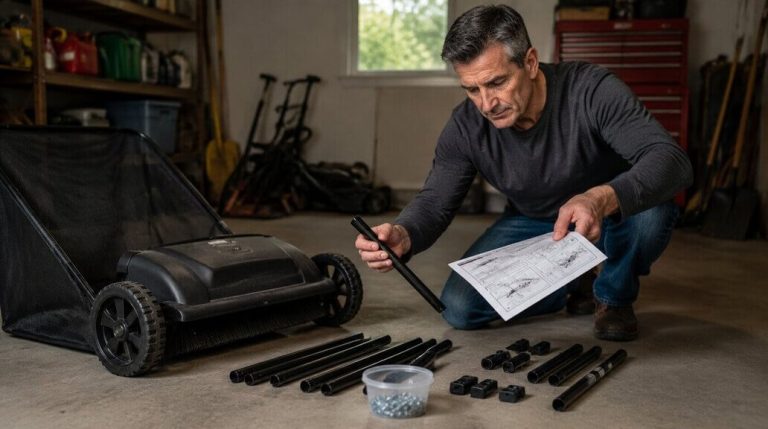
Do not just dump the bag on the lawn. I made that bad mistake once. The cold, shiny bolts vanished right into the tall green grass! It drove me totally crazy.
Follow these easy steps instead:
- Lay parts in groups: Put all the long metal rods together.
- Match with manual diagrams: Look at the paper pictures very closely.
- Identify left and right pieces: They often look the same but fit differently.
- Keep bolts in a container: Use an old plastic cup. Hearing the heavy metal clink inside feels safe.
Pro tip: Do not fully tighten anything yet. Leave all the nuts a bit loose. You will thank me later when the frame parts need to shift to fit!
Assembling the Frame (Where Everything Starts to Make Sense)
This is the big turning point. Your pile of loose metal parts finally looks like a real machine.
When you learn how to assemble a lawn sweeper, building a strong frame is your first real step.
Here is a quick look at the main frame parts:
| Frame Part | What It Does | Common Mistake |
| Main Bars | Hold the heavy wheel base | Tightening the bolts too fast |
| Crossbars | Stop the machine from shaking | Flipping the metal upside down |
Connecting Main Frame Sections
I joined the main metal bars on a breezy Tuesday afternoon in my driveway. The cold steel felt very heavy in my bare hands.
First, you need to align the long metal bars correctly. Take your time with this.
Next, slide the silver bolts in, but do not force them. If you push too hard, the metal threads will break.
Just spin the nuts on by hand. Keep the whole structure slightly loose for now. You need that wiggle room for the next step.
Adding Crossbars and Supports
Next, you will add the middle crossbars and supports. These thin pieces are vital. They stabilize everything and stop the frame from shaking.
I made a very silly mistake here. I flipped the support bar upside down. I stared at it for ten minutes because the holes would not line up! I just laughed at my own rush, flipped it over, and it fit perfectly.
Once I set it right, the pieces slid together nicely. That annoying slight wobble disappeared instantly. The metal locked up tight, and the frame finally felt solid.
Installing the Axle and Wheels
Finally, you have something that rolls. Suddenly, all this hard work feels like real progress!
Here is a quick look at the wheel parts before we start:
| Part Name | Why It Matters | Watch Out For |
| Steel Axle | Carries the heavy weight | Slide it in gently |
| Metal Washers | Stops parts from rubbing | Easy to drop in the grass |
| Lock Pins | Keeps the tires on tight | They can pinch your skin |
Sliding in the Axle
I did this step on a bright Wednesday morning. My knees really ached from kneeling on the hard driveway concrete.
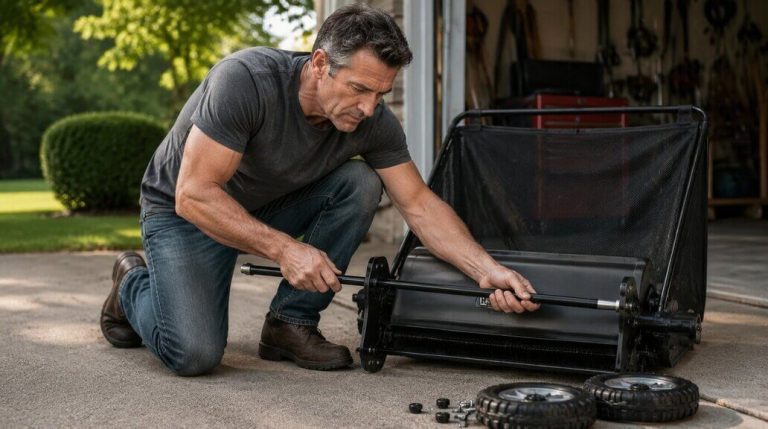
When you learn how to assemble a lawn sweeper, the axle can be a bit tricky. You have to push the long steel rod right through the main frame holes.
Getting it in the exact right spot is key here. Make sure it sticks out evenly on both sides. Give it a quick spin with your bare hand. A smooth spin now saves you from a bumpy, uneven ride later.
Attaching Wheels Correctly
Now comes the fun part. You get to put the big rubber wheels on!
The washer and pin order is a very big deal. If you mess this up, the wheels will wobble badly.
Follow this simple order:
- Slide the big wheel onto the axle first.
- Slide the flat metal washer on next.
- Push the thick lock pin right through the hole.
Check the balance by giving the tire a firm shake. My absolute favorite part of the whole build was pushing that pin down. I heard this loud, satisfying click when the wheels locked in tightly. I smiled so big. It felt like a huge win!
Attaching the Brush System (The Core Functionality)
This is the real heart of the machine. Take your time here, because doing it right matters way more than going fast.
Here is a quick look at why the brush setup is so vital:
| Brush Height | What Happens on the Yard | How It Feels to Push |
| Too High | Misses the leaves entirely | Super easy, but totally useless |
| Too Low | Rips up the green grass | Very heavy and super tiring |
| Just Right | Flicks leaves right into the bag | Smooth and very steady |
Mounting the Brush Assembly
I tackled this part on a quiet Friday evening. My garage smelled like old dust and fresh grease.
Mounting the brush unit can be a bit tricky at first. You must align the stiff plastic brushes right onto the main axle. Pay close attention to the spin direction.
The brushes have to spin forward to toss the leaves backward into the bag. I actually put mine on backward on my very first try! It just pushed a sad pile of leaves around the yard. It was highly annoying but also pretty funny to watch.
Setting Initial Brush Height
Getting the height right is a very common frustration. It deeply affects your pickup performance later on.
If you set the brushes too low, they drag hard on the dirt. It feels exactly like pushing a heavy rock. If you set them too high, they barely touch the grass. They will miss every single pine needle.
When you learn how to assemble a lawn sweeper, fixing this height is the ultimate secret. You want the bristles to just lightly tickle the top of your grass blades. Listen for a soft brushing sound on the concrete floor. That soft sound means you nailed it perfectly.
Installing the Hopper Bag and Handle or Tow Bar
Now the machine starts looking complete. You can finally picture actually using it to clean your yard!
When you figure out how to put a lawn sweeper together, the bag is often the toughest part.
Here is what you need to know about the final pieces:
| Part Name | Assembly Tip | Why It Is Important |
| Hopper Bag | Stretch it tight | Stops leaves from falling out |
| Support Rods | Slide in gently | Keeps the bag from sagging |
| Tow Hitch | Lock the pin | Keeps the unit hooked to the tractor |
Hopper Frame and Fabric Bag Setup
I will be totally honest with you. Getting the fabric bag onto the metal frame is a real workout.
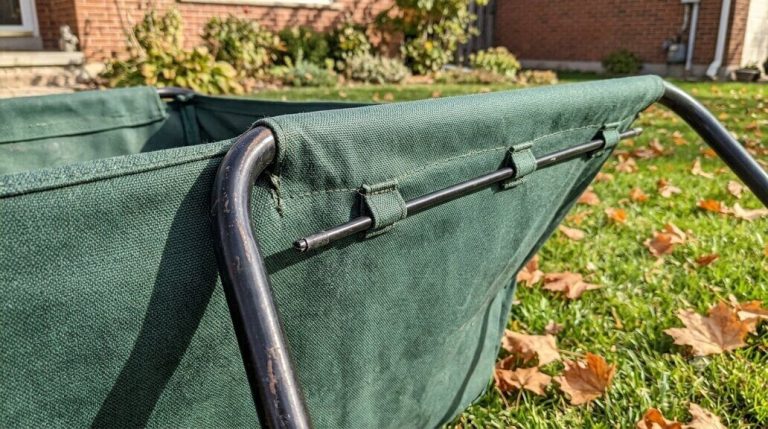
I did this on a hot Sunday afternoon, and I was sweating! You have to slide the thin support rods into the tiny fabric loops.
Next, you have to pull the thick canvas over the metal edge. It is a very tight fit. You must secure the fabric evenly all the way around. Pulling it tight avoids any annoying sagging issues later when the bag gets full of heavy leaves.
Handle or Hitch Installation
The last big step depends on your exact model.
If you have a push model, you just bolt on the long handle. Make sure you set a handle angle that feels good for your back.
If you have a tow-behind unit, you will attach the thick metal hitch. You just drop the heavy hitch pin right into place.
I remember stepping back after dropping that pin in. My hands were dirty, but I felt so proud. This is the exact moment when it finally feels “real,” not just a box of random parts!
Final Tightening and Alignment Check
This is where you lock everything in. It eliminates huge headaches later on.
When you learn how to assemble a lawn sweeper, the final check is a massive deal. I grabbed my cold wrench on a quiet Monday evening. I was so ready to be done. My back was sore. But skipping this step is a bad idea.
You left the frame loose earlier, right? Now, go back and tighten all the bolts evenly. Do not just crank one side down tight. Move side to side so the metal stays straight.
Here is my quick checklist before taking it outside:
| What To Check | Why It Matters | My Quick Test |
| Frame Stability | Stops wild shaking | Shake the main bars hard |
| Wheel Alignment | Keeps it rolling straight | Push it ten feet forward |
| Brush Clearance | Grabs the leaves perfectly | Look under the metal housing |
Testing the spin shows how to put a lawn sweeper together the right way. I lifted the back end up slightly. Then, I spun the big rubber wheels hard with my bare hands.
The brushes should spin fast and smooth. You might hear a high, slight squeak. I worried I broke a hidden gear! I almost panicked. But just relax. Slight squeaks are completely normal early on. The new plastic and metal parts just need time to settle in.
First Test Run and Quick Adjustments
The real truth shows up very fast. After you figure out how to assemble a lawn sweeper, you must test it outside.
I rolled mine out to the front yard on a warm Thursday evening. I was eager but a bit nervous. I picked a small patch of grass right under my big oak tree for a quick trial. Within just a few short passes, you will know if something is off.
You really need to watch the brush contact on the ground. Adjust the height right away if needed. Small tweaks make a huge difference here.
Listen closely for these simple sensory cues:
| Sound You Hear | What It Means | Fix Needed |
| Soft brushing swish | Perfect height | None! Keep on sweeping. |
| Loud scraping noise | Set way too low | Raise the brush height. |
| Total silence | Set way too high | Lower the brush height. |
My first pass made a horrible, loud scraping noise. It sounded like I was dragging a heavy metal trash can across the road! I stopped right away to fix it.
I turned the adjustment knob and raised the brushes up just half an inch. On my second try, I heard that lovely, soft brushing sound. I smelled the crisp, dry leaves tossing up into the bag. I smiled big and waved at my neighbor. It finally worked perfectly!
Common Assembly Mistakes and Simple Fixes
Almost everyone slips up at least once. I made some really dumb errors on a hot Tuesday afternoon in my driveway!
But do not worry. You can fix these issues very fast. You do not have to take the whole machine apart to recover.
Here is a quick guide to common assembly mistakes:
| Assembly Mistake | What Happens to the Sweeper | The Quick Fix |
| Tightening Early | Metal parts do not align right | Loosen, shift, and retighten |
| Bad Brush Height | Misses leaves or drags heavy | Turn the adjustment knob |
| Crooked Wheels | Sweeps in a very uneven line | Pop the pin and realign |
| Sagging Hopper | Drops all the collected leaves | Pull the canvas tightly |
Tightening Too Early
This is a very common trap. When you learn how to assemble a lawn sweeper, you naturally want to rush.
I tightened the first frame bolts instantly. Then, the next set of holes would not line up at all! My face got red from frustration. I had to walk away for a minute.
The fix is super simple. Just loosen the tight nuts, shift the metal bars to fit, and retighten them later.
Incorrect Brush Height
We talked about this earlier, but it is a huge deal.
If your brushes sit too high, they grab zero leaves. You get no pickup at all. If they sit too low, the machine feels like a heavy tank. It becomes too hard to push.
Just turn the height knob until you hear that soft, gentle brushing sound on the grass.
Misaligned Wheels or Axle
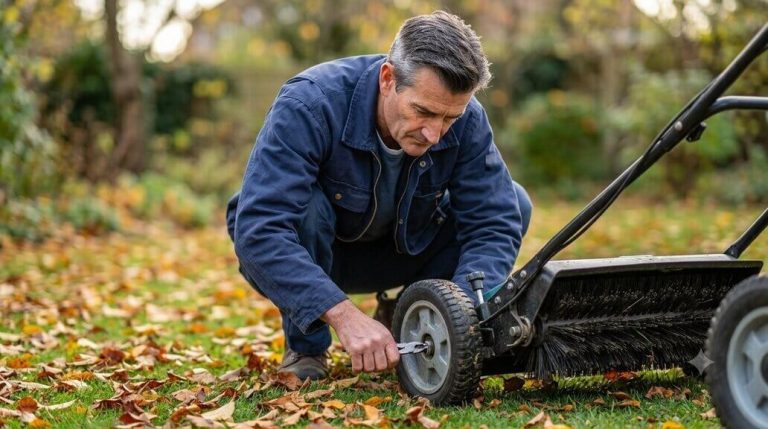
I put one wheel on a bit crooked during my first build. My sweeper pulled hard to the left.
A misaligned axle leads to very uneven sweeping. It leaves an ugly, messy stripe of leaves on your lawn. To fix it, just pop the metal lock pin out. Slide the rubber wheel back on straight until it clicks.
Loose or Sagging Hopper Bag
A loose bag reduces your collection efficiency really fast.
I did not stretch the heavy canvas tight enough last fall. The bag sagged down and dragged right on the dirty ground. It actually rubbed a small hole in the bottom fabric!
Just take two minutes to pull the fabric tight over the metal support rods. Make sure it snaps firmly into place.
Frequently Asked Questions
Is it hard to learn how to assemble a lawn sweeper alone?
I built mine all by myself in a short time. The light parts are very easy to lift and move around. Just take your sweet time and have fun making your yard neat!
Is learning how to put a lawn sweeper together safe with a drill?
I think it is best to use hand tools to keep parts safe. I used a big drill once and stripped the soft bolts! A hand wrench keeps the whole build safe and strong.
Why are my new rubber tires not spinning the right way?
My wheel pins were too tight and bent out of shape. I popped the pin out and slid the tire back on straight. A smooth spin leaves your large yard looking very clean.
How do I fold the big hopper bag for the cold winter?
I just pull the support rods out and lay the cloth flat. I store it in a dry spot so the bag stays safe from mold. This quick step helps the yard gear last a long time!
What if I lose a small nut in the tall yard grass?
Do not panic if you drop a small piece in the dirt. I buy cheap spare bolts at hardware shops that fit just fine. Keep all your parts in a cup so you do not lose them!